Total Pageviews

Popular Posts

Friday, December 28, 2012

Malam Straight Key 1 Januari


Setiap tahun pada 1 Januari akan berlansung acara ARRL Straight Key Night. Bermula dari 0000 UTC sehingga ke 2359 UTC. Acara ini bukanlah contest atau pertandingan untuk memungut mata tertinggi, tetapi ia merupakan acara tradisi bagi mengingati dan menyambut akan mod CW atau kod Morse yang sentiasa menjadi salah satu kemahiran dan mod pilihan bagi radio amatur. Tiada sistem pemarkahan dalam acara ini kerana setiap peserta adalah pemenang.

Selalunya aktiviti ini diadakan pada setiap jalur di frekuensi tinggi (HF). Pada asalnya, idea untuk acara ini adalah dari Dan Henderson, N1ND. Beliau menulis tentang SKN ini di majalah QST. Beliau memberi idea straight key night adalah untuk memperingati semua elmer yang telah banyak membantu beliau dan juga radio amatur lain untuk menguasai kod Morse.


Kenapa straight key? kenapa bukan paddle? ya. mesti ada yang tertanya. jawapan yang terbaik adalah, straight key merupakan peralatan "user interface" yang pertama yang dicipta untuk menghantar kod Morse. sebelum wujudnya paddle, straight key banyak membantu operator di kapal, stesen keretapi dan juga pejabat pos untuk menghantar mesej kepada stesen lain.


Straight key telah lama wujud dan sejarahnya, ia telah digunakan oleh bapa kepada penghantaran radio jarak jauh iaitu Guglielmo Marconi. Straight key amat mudah untuk dibuat, terdapat banyak pilihan dan juga design straight key. Straight key juga digunakan pada perang dunia, pada aktiviti SOTA radio amatur, aktiviti IOTA, contest, SKCC net dan sebagainya.


Terdapat ramai SWL di luar negara yang memiliki straight key dan mampu menterjemahkan kod Morse. Untuk mengetahui tentang ARRL Straight Key Night, sila ke http://www.arrl.org/straight-key-night


"CW - telah digunakan dan dinikmati sejak hari terawal wujudnya radio amatur"


Monday, December 24, 2012

Gentlemen's Agreement ?


jika dilihat pada band plan 40m dari IARU region 3, jelas mengatakan bahawa tiada had untuk mod CW, tetapi ada had untuk mod SSB iaitu dari 7.030mhz dan ke atas. persoalannya, bolehkah seseorang itu mengoperasikan mod CW pada semua frekuensi di 40m band? mari kita tengok.

kalau dilihat dari band plan IARU region 3, sudah tentu tiada masalah kerana tertulis mod CW boleh digunakan pada awalan frekuensi sampai ke hujung.

Tetapi, ada sesetengah berkata. gentlemen's agreement telah dibuat, dan semua telah bersetuju bahawa pengoperasian mod CW harus di awalan frekuensi di 40m band dan mod SSB di atas sehingga penghujung 40m band.

Persoalannya lagi, adakah gentlemen's agreement yang telah dibuat itu betul-betul dipersetujui oleh semua pihak? dan kenapa pengoperasian mod SSB di CW portion berlaku? mari kita lihat video


Di dalam video ini terdapat stesen Indonesia yang menggunakan 7.005mhz untuk beroperasi dalam mod SSB, mari kita lihat band plan dari ORARI Indonesia pula.


Pada band plan ORARI pula, jelas tertulis bahawa, 7.000 - 7.200 boleh digunakan untuk mod CW, 7.025 - 7.040 adalah untuk data dan 7.040 - 7.200 untuk mod SSB. Lagi sekali, tiada had untuk mod CW, tetapi ada had untuk mod SSB.

Dalam kedua-dua band plan dari IARU region 3 dan ORARI tidak tertulis bahawa spot untuk pengoperasian SSB berada di sekitar 7.005mhz.

Back to the topic, adakah gentlemen's agreement yang telah dipersetujui itu benar-benar diterimapakai oleh semua pihak? (pengoperasian mod CW harus di awalan frekuensi di 40m band dan mod SSB di atas sehingga penghujung 40m band.)

Ataupun semua ini merupakan undang-undang yang tak tertulis atau unwritten law? kalau semua ini unwritten law, jadi apa yang IARU region 3 dan ORARI tulis pada band plannya? dan adakah gentlemen's agreement yang dikatakan telah dipersetujui itu sebenarnya tidak dipersetujui oleh semua pihak? jikalau SSB boleh dijalankan di CW portion, adakah CW juga boleh dijalankan di SSB portion?


Sunday, December 23, 2012

HST world medalist Ludmila from Belarus flying at 235 CPM

The importance of Correct Morse Code Spacing!

Spacing in Morse code


For a CW operator, the spaces in Morse code are quite important. The spaces between dashes and dots, those between words and those between sentences make up Morse code. They are as important as dashes and dots themselves. Imagine that these spaces are irregular or inappropriate. It could be almost impossible for us to read the code. Appropriate setteing of spaces, that is, spacings, is crucial for beautiful and efficient CW.

I would like to mention of two issues related with the spacing.

The problem of "BK" sent in the end of messages which I questioned in the previous article could be a kind of, or an extension of this issue. In the end of messages, there should be appropriate spacings.  Sending IDs could be a kind of spacings. It will enable us read the message comfortably as well as fluently.  Without this "spacings" between transmission and reception, we could hardly go on communicating.

The other point is the minute but still substantial variation of spacings. CW is often compared to music. Silence in music should be comparable to spaces in Morse code. When some phrase or motif is accentuated in music, a minute pause of silence is often put immediately before it. It is called "Auftakt" in German. In sending Morse code, we put a bit of exaggerated space before some word which we would like to emphasize, if consciously or not. For example, when calling CQ, we often wait a bit before giving our call following DE. It is to emphasize our call sign, which is most important in this message. If this "Auftakt" sounds proper, the Morse code could be a real music.

CW is an art. It is not so complicated as the other arts like music. It sounds, however, like real music in our mind. It delivers our idea and emotion directly. Why won't you send it in a beautiful and efficient way?

http://nuttycellist-unknown.blogspot.com/2012/01/spacing-in-morse-code.html

Sound-sensitive Android figure speaks in Morse code


Instructables user [tanbata] recently got his hands on a Google Anroid figurine and thought that while it looked great, it served no real purpose. He decided to change that, and converted this once-useless hunk of plastic into a miniature robot that moves and responds to sound.

He pried of the head of the figure and got busy fitting a servo into the Android’s body to enable head movement. An ATiny was added to control the figure, along with a microphone to enable it to respond to sound. A piezo was inserted to relay Morse code messages, and a handful of LEDs were installed in the body cavity and eyes of the figure just for kicks.

When the bot is powered on and senses a loud enough sound, the eyes light, the head spins from side to side, and the robot spouts off a random message in Morse code as you can see in the video below.

It’s not the most advanced project out there, but with a few tweaks, it could make for a great USB-powered email or IM notification system for your PC. Better yet, it’s a great project to do with a child who is interested in electronics, since they get to make a cool robot toy they can keep.

What were the Morse requirements?


What were Morse code requirements in Amateur Radio, before the 2001 changes and the complete abolition of code testing in 2005?  And what were the testing procedures?

A majority of active amateur radio operators grew into the hobby during the period of “incentive licensing.”  The general idea was that operators who demonstrated more skills, earned more privileges including more bandwidth.  So there were three standard Morse qualifications that would be familiar to a majority of us:

Novice.  The Novice class license was the entry level, or easiest to achieve.  When the class was introduced, the rules called for a Novice to prove an ability to send and receive Morse code at 5 WPM.
General.  The General class license required Morse proficiency at 13 WPM.
Extra.  The highest license class, or Extra, required Morse proficiency at 20 WPM.
At VE (Volunteer Examiner) sessions the examiners would play a bit of warmup or practice material and then a  5 minute tapes of the exam test.  The Novice was sent at a character speed of 15-18wpm (standardized on 15 in 2001) with proportional or “Farnsworth” spacing.  The General test was at a character speed of 18-20wpm and the Extra was at 22-23.

Some VE teams had headphones for the candidates, but most just played the tape over a speaker.  In theory a CW-qualified member of the VE team had to monitor the session in case there were complaints of a bad tape, or extraneous noise, etc.

After the tape was played the candidate was usually given a minute or two to “correct his copy,” which always seemed strange to me but yes you could fill in the blanks if you knew what the word was.  In the 5wpm test the VE team was allowed to determine, and state up front,  how many characters (if any) the candidate would be able to write down as dots and dashes for translation in the correction period).

Then the candidate was given 10 questions to answer based on the received text.  The candidate was required to answer 7 out of 10 questions correctly.  Some VE teams (notably W5YI VEC teams) used multiple choice questions.  If the candidate failed to answer 7 questions correctly, the copied text was examined and if the candidate copied one minute solid (anywhere in the test) a pass was awarded.  I saw that happen many times with the 5wpm test, but very rarely with the higher speed tests.  A minute of “solid copy” meant 25 consecutive characters without error at 5 WPM, 65 characters at 13 WPM, and 100 characters at 20 WPM.

In 2001 the 13 and 20 WPM requirements were dropped, and the 5 WPM test was standardized at 15 WPM character speed (previously the ARRL used 15 and the W5YI group used 18).  And multiple choice tests were banned, period.

The Morse tests were usually given first, and started with the 20 WPM test as a sensible arrangement to minimize work for the VE team– unlike the written tests, you could jump right in at 20 and if you passed, you you received credit for the lower speed elements and didn’t have to test them.  I always wished the written tests had been done the same way.  The fact that you had to pass them in order was an indication of just how much of the Novice test was about being a Novice, etc, even though if you were aimed at general you might wonder why you needed to know all the band, mode, and power limits etc. stuff that pertained to Novice and Tech classes.  It is also worth noting that the written tests for license classes that had a Morse requirement (Novice, General, and Extra) were substantially shorter and easier than those that didn’t (Technician and Extra).
Before incentive licensing there were a number of different standards, and test formats, but perhaps the most interesting was the “sending test.”  Remember the wording of the requirement was “send and receive?”  Sending tests were abolished about the time non-departmental or VE (Volunteer Examiner) became common.  There were two reasons for dropping the sending requirements:

1.  The sending tests were inefficient and expensive.  While a room-full of candidates could take the receiving test at the same time, the sending tests were one-on-one with a live examiner.

2.  Candidates who passed the receiving test “almost never” failed the sending test.  This was seen as proof that anyone who can copy code can send it.

The problem with argument 1. is that under the VE system, the examiners are all volunteers and so there was no cost. The general speculation was that dropping the sending tests had more to do with the notion that few VEs were competent to administer a sending test, evaluation was too subjective, and/or the FCC didn’t trust VE’s  with anything that couldn’t be proven on paper.

The problem with argument 2. is a matter of simple logic.  Nearly 100% success in the sending tests did not prove that you can send code if you can receive it. It proved that you could learn to send code.  Without the sending test, many new hams went on the air without bothering to learn how to send code.  There was a built in “incentive system” to the extent that most hams started out with lower class licenses and thus tended to hang out in their own parts of the band, so it wasn’t the chaos on the bands that happened later when the code requirements were dropped.  But it could and should have been seen as a potential problem.

Learning the Code


My Thoughts on Learning the Code:

First off I start with a disclaimer.  I am learning too, only passing on the information that I read and get from my elmers.  Everyone learns differently so these are my thoughts on how to learn Morse code.  I got my information from a lot of sources, I am an Instrument Ground Instructor for flying, I was a military Instructor in the USAF, I have taught classes on Software Engineering, listened to my mentors, read a lot of information and used common sense in places.  My methods might not work for you, that’s OK, hopefully you will still get something out of the things I say.  Good Luck and above all have fun!

First rule:  Until you can hear the proper spacing of a Morse code signal DO NOT USE YOUR KEY;  especially a straight key.   Reason: sending CW is like playing an instrument by ear, so if you listen to a bad musician play a piece and copy it you just learned how to play the piece incorrectly.  You do not want to teach yourself improper spacing by hearing improper spacing; it is very difficult to unlearn something learned wrong.  Listen to well formed CW to hear what each character sounds like.  Many resources are available from the free G4FON program,  CD’s,  ARRL downloads and radio broadcasts.  Do yourself a big favor and learn to hear the characters before trying to send.  More than likely you will not send correctly and will reinforce the mistakes by listening to yourself making them.

Second Rule: Practice every day!  I will say that again;  practice every day!  They don’t have to be marathon sessions, unless you’re having fun, then practice as long as you are having fun.  We are all busy, that is for sure, however just five minutes a day is all that is needed to make progress.  Five minutes, I am sure we can all spare five minutes to achieve a goal in our radio hobby!  The time you practice should be a quite, relaxing time so you can concentrate solely on the code.  If you have had a really bad day and are frustrated or in bad sorts then skip the practice; you will not do well and will only get frustrated for no reason.  If you’re having so many bad days that you only get to practice once in a while – time for a life adjustment!  Every day you miss is a loss of two days of practice, especially in the beginning.  Practice! Practice! Practice!

Third Rule:  Get on the air even if it is only to listen to others.  Try to copy characters, make notes as to how stations operate.  Rag chews, DX, contests are all different in the way they operate.  Not hard and fast rules and not always the same but you will get a better feel on how to operate.  Here is a tip for the brave (Thanks to W7BRS):  I am sure you know what CQ sounds like if not get that sound in your head, it is what tells you someone is calling, pretty important.  Learn your call sign at speed, say 25WPM, learn the individual characters of you call, what 5NN sounds like, TU, UP and ?.  When you hear a DX station in a possible pile up, probably working at 25WPM or greater, try to work out the call, listen for the 5NN and TU.  Send your call and listen for your call 5NN.  The DX station just replied to you.  Send back 5NN TU for short or UR 5NN de your call TU for a bit more chatty exchange, most like the quick fast one though.  You can use your rigs memory keyer if your rig has one if you can’t key yet.  The only problem is if the DX station only gets part of your call, they may respond K9? or VD?  that is your signal to send your call a couple times in a row.  Another thing that they may do is send back your call with a question mark: K9VD? the DX station thinks this is your call but is not 100% sure, if it is your call send back RR fro Rodger Rodger or QSL.  If he has the call wrong, send your call twice and wait for the response.  Hopefully the DX station will get your call and complete the contact.  If not do the best you can, they will know you are new and most will try to work with you to make the contact.  If not they will TU, CQ whatever and move on. Nothing to be ashamed of, you tried, next time you will get them because practice makes perfect.

Methods:

There are several methods to learn Morse code; I do not believe in the listen for the dits and dahs method at all.  Some instructors actually tell you to throw away the dit and dah charts as well!  Reason:  You are supposed to be listening to the sound the pattern of dits and dahs make for each character, not decoding dit and dah patterns in your head to the character associated with those dits and dahs!  When starting to increase speed most brains will not be able to decode the dits and dahs at that speed, hence the speed wall is hit. In a nutshell you taught yourself to read the dits and dahs instead of the sound and now you have to relearn a new method of listening to Morse code; remember what I said about unlearning, it’s a bugger.  Most folks get frustrated and give up at this point thinking they can never succeed, not true, you can if you start out the way you mean to go on!  All I can say is that a lot of people just don’t believe that they can learn this way and wont even give it a try.  These folks will fall into the pool of learners that don’t have very high success rates, high frustration and even higher “I am never using that CW @^&*# ever again”.  You got to have trust, especially in yourself, that you can do it!

I believe that learning the code at a slow speed is not practical.  Reason:  Again, you are listening to individual dits and dahs.  The characters of Morse code make a distinctive sound you are trying to listen and hear that sound not the individual dits and dahs.  Speed is then nothing more than training your brain to recognize these sound at a faster pace.

I like two standard methods for learning the code: Farnsworth and Koch.

Farnsworth:  In this method you play characters at a speed of not less than 15WPM, the faster the better.  If your goal is 25WPM then start there it will save a lot of time in the long run.  With this method you have individual characters at your target speed but with a gap of maybe 5WPM.  The methodology behind this system is that you learn to hear the characters at speed and your brain has time to process the character  before the next one starts.  Once you learn the sounds of the individual letters you start to shorten the gap between them, your brain can process the letters quicker as you learn the sound each makes, until you are at full speed.
Koch:  In this method you play two characters at full speed, the target speed you want to learn, with normal spacing.  You practice copying these two characters for five minute runs until you achieve a 90% copy.  Then you add another letter and repeat the process until all characters are learned.  This method is the fastest way to learn but can be frustrating to some folks; those that stick with it are rewarded!
There are going to be days when for whatever reason you just can’t seem to copy the letters that you have already learned.  From what I have been told this is normal.  Don’t add any new characters that day and repeat the same characters then next day and see if you do better.  If you do, great, add another character and move on.  If not, don’t fret, just don’t add any more characters until you are comfortable with the ones that you have.  I try to identify the characters that I am having problems with and do a repeating run of those characters with Just Learn Code.  This can help you concentrate on the characters that are giving you trouble without all the other characters in the mix.

Tricks I Use

Once you get up to about six or seven characters create words from your letters and use Just Learn Code to copy the words.
 Copy the most common digraphs, trigraphs, double letters and two, three and four letter words in the English language.  (To be added…)
Copy the most common used English words. (To be  added…)

from http://kf7ekb.com/morse-code-cw/learning/

WJ5O - Ex ARRL CW Examiner


on 19 July 2005 the FCC released Notice of Proposed Rule Making and Order (NPRM), .... When acted upon as written and posted in the Federal Register ... this page will no longer be necessary.
Looks like 23 February 07 is the day that Morse code is no longer a requirement for Amateur Radio licensing.......
Just a note...... 23 February 07 is now history......... Just leaving the page here for a bit of nostalgia.
(13 March 2007)


.... These notes are from My experience's of administrating the CW examination as a member of a VE team...... even before the FCC turned it over to the Amateur community in mid- eighties. --- all NOVICE Class 5 WPM examinations were administered by a General Class or higher prior to that.

TIPS FOR TESTING scroll down a little ... DONT WAIT FOR THE FCC TO REMOVE THIS REQUIREMENT.....Get the code "under Your belt"

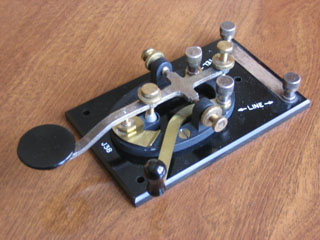
MORSE CODE a little background

It is a relative simple matter for anyone to broadcast a message using voice and the
English language. The only requirement is that the individual sending the message
should speak into a microphone connected to a transmitter. At the receiving end, the
procedure is just as simple, the individual desiring to understand the transmitted message
needs only to tune a receiver to the broadcasting station and listen to the spoken words
as they are reproduced by the receiver.
The transmission of messages by code however, requires a special skill on the part of
both the sender and the receiver.

WHY USE CODE TRANSMISSION IF VOICE TRANSMISSION IS SO MUCH SIMPLER?

1. Radio communication by code requires less elaborate, less costly and less bulky
equipment than does voice radio communication.

2. Code transmission will penetrate radio and atmospheric interference more readily than
will phone transmission. Code transmission will usually be intelligently received under
conditions that render voice transmission and reception impossible. The spoken word with
it's inflections, intonation and a tremendous variety of sounds is infinitely more complex
than is the single piercing note of a radio telegraph signal.

3. The radio telegraph code constitutes an invaluable method of sending secret
messages or security information with a greater amount of safety.

4. A transmitted code signal requires much less frequency space than does a radio
telephone signal. Approximately 6 KHZ for an AM signal and 15 KHZ for the wideband
FM signal. The typical CW signal is 1.5 KHZ.

5. Amateur radio operators use "Q" signals which have common meaning in languages
other than English. This permits the exchange of basic information in CW between
operators regardless of their English speaking ability.

The Morse code is made up of letters as is most spoken languages. The code letters
consist of sounds of short and long duration which are called DOTS & DASHES.
(sounded like DITS & DAHS) These sounds are usually high pitched tones of about 500
to 800 Hertz or approximately the sound of a high C on a piano. The long sound (DAH) is
three times as long in duration as the short sound (DIT). Each letter of the alphabet, each
number and each punctuation mark is composed of a different combination of these long
and short sounds.

Since Morse code consists of sound combinations it is very similar to music. A person
listening to the National Anthem hears only the melody and not the individual notes of the
music. Morse code is quickly mastered by listening for the "melody" of the letter sound
rather than counting the individual dits and dahs.

Now for the Examination

NUMBER NUMBERS NUMBERS ... KNOW THE NUMBERS It's difficult to have ten
questions about a five minute QSO without four or five of them requiring
numbers. (Call Signs, RST, Antenna Height, number of tubes, power, age,
years a ham....etc)

Expect to have a CALL Sign with a DAH DIT DIT DAH DIT ( / ) ... FCC exams are
required to have all 26 letters, zero thru 9 numbers, at least 4 punctuation
marks including the slant bar & procedural SK. Learn the common configurations
for CALLSIGNS like 1x2, 1x3, 2x1, 2x2 & 2x3 ... That way there will be no
surprises if something like WN7OPQ/6 is heard.

The exam is a typical QSO that will last for a little over five minutes.
Before the exam there will be a one minute warm-up to insure that everyone
can hear the message. You will be given a paper to copy both the practice
warm-up minute and the QSO . The QSO will start with a series of six "V"s and end
with the procedural sign SK.

A passing score is achieved by answering 7 out of the ten questions
correctly or 25 characters in a row. (Not counting the V's or Warmup)...
Numbers and punctuation marks count 2 and letters count 1.

Typical questions:
What is the Call of the receiving station?
What is the location of the receiving station?
What is the Call of the Transmitting station?
What is the location of the transmitting operator?
What was the name of the receiving operator?
What was the RST report given by the transmitting operator?
What was the radio being used by the transmitting operator?
What did the transmitting operator say His power output was?
What type of antenna did the transmitting operator utilize?
What was the height of the antenna?
What was the weather described as?
How long had the transmitting operator been a Ham?
What was the reason given for ending the contact?

ADDITIONAL HELP: Learn the names of as many type of radios as possible...
especially the more common ones like KENWOOD, ICOM, YAESU, TEN-TEC, SWAN,
NATIONAL, HALLICRAFTERS, SBE & HEATHKIT.

Learn the names of the common antenna configurations..... like DIPOLE,
DELTA LOOP, WINDOM, ZEP, BAZOOKA, YAGI, BEAM, INVERTED VEE, LONGWIRE & ROMBIC

THAT WAY IF YOU COPY A PORTION OF THE RADIO NAME OR ANTENNA TYPE IT WILL BE EASIER TO FILL IN THE BLANK.

Be "up" for the examination both mentally & physically.
A good night's rest and something on the stomach is important.
Comfortable attire - (pinching shoes or a tight collar is a distraction)
Get to the examination location early. (get familiar with the testing facilities ..this
takes the apprehension "edge" off)

Whenever the examination is announced - secure a seat close to the sound.
When given the opportunity - copy all of the "warm-up" or practice run.
CW exams start with a series of six Vs and end with the procedural sign AR or SK

LISTEN FOR:
Call signs (If you miss part at first, they will also be in the closing).. The first call given is the RECEIVING operator followed by DE .. and then the Call of the TRANSMITTING operator

Names of the operators (receiving operator usually near the first of message)
.... Expect short names like JOE, JIM, JACK, BILL rarely a SAMANTHA or CLEMENTINE
but often a MARY, JILL, BETH

When you hear UR RST or SIGs is/are --- know there will be three numbers coming
next. Most likely the first will be a 5 and the last a 9 (know what RST is ....and that the first number is never over 5).... remember, it's possible to get a RST report like .... 599 W/QSB (with fading).. ....QSB....QRM ..... QRN are the only ones I have ever seen on a 5 WPM exam.

If you miss a Character----FORGET IT (for now) -- mark your copy with a "-" or just a space where the letter should be. These "holes" can be filled in later.... see below.

QTH - look for City & State (rarely DX locations on 5WPM exam) Sometimes just
the CITY or the STATE is given.... and the question usually asks for the CITY or STATE
even if both CITY & STATE are given.

When you hear weather or WX it's usually a two word description following.
(WINDY and WARM......... COLD and FREEZING .....DAMP and RAINY)
Sometimes followed by "TEMPERATURE IS __ DEGREES"

Type of radio (rig) --sometimes descriptive like OLD TUBE or QRP but
most often the name of a manufacturer.... KENWOOD, ICOM or YAESU
(TEN-TEC, SWAN, NATIONAL, HALLICRAFTERS, SBE, HOMEBREW
& HEATHKIT). ... be familiar with names of Rig types

Antenna used. Know the names of several configurations. DIPOLE, DELTA LOOP,
WINDOM, ZEP, BAZOOKA, YAGI, BEAM, INVERTED VEE, LONGWIRE & ROMBIC
By knowing the configuration names of the antennas it helps to fill in the "holes" in Your copy.

Comment like "BEEN A HAM 30 YEARS" or "AM IN 12TH GRADE"

Listen for why QRT........ "I MUST QRT FOR WORK".... "QRT FOR BED"

Listen for Callsigns again

The CW message is over: Listen for directions from the VE

Scan your copy - fill in the" holes" of the letters missed. (GROC_R) most likely
GROCER (EN_INEER) likely ENGINEER .... GET THE IDEA?.... This filling in of the "holes" helps in getting 1 minute of straight copy (25 characters in a row)..... a person must be able to communicate at 5 words per minute...... a copy of CHICA-O and later adding the G still means that the person got the meaning of the communication.

See if QTH corresponds to the callsigns (KL7XXX should be Alaska--WH6XXX in
Hawaii & etc).... KNOW the Call sign areas

Read over ALL the questions BEFORE printing any answers.

Usually the questions follow the copy (first in message --- first on test generally the
same sequence - but there are exceptions)

Answer all of the "SURE" ones FIRST. (Hopefully 7 or more)....

Look at the "doubtful" ones. Are any a "toss-up" between 2 responses? Like is it a four or a six? If its in a Callsign ..... see if You answered Florida for a location ... Florida is in 4 land

Look for "tell-tell" letters in your copy--if a couple of letters
match to what You have knowledge of , MARK IT. (DI_O__ is likely DIPOLE.... even
if the copy is just D_____ and it's about an antenna it's probably DIPOLE
if the copy is just _a___ and it's about a radio it's probably YAESU

If there is one "I have no idea" it's worth a guess. If it's a callsign remember the FCC
requires ALL numbers be used in the exam. Count the numbers You have copied....
If You are missing a ZERO or any other number, put it in the Callsign that doesn't have a number in Your copy.

If an Op says His age is 78, it's likely He's not a go-go dancer. If an Op says STUDENT
don't expect a number over 20 for age.

As a last resort----- EDUCATED GUESS...... any omitted answers are already incorrect.
If You don't have anything copied for antenna .... dipole, vertical, beam & longwire
showup most often. NEVER OMIT AN ANSWER ...... put down an educated guess.
Nothing copied for the rig? ... Kenwood, Yaesu or Icom .... certainly better than leaving it blank.

All of this is NO substitute for CW skill however, but it's a sure thing to help overcome the
exam apprehension and to secure a passing score. 7 out of 10 right

On the 5 WPM examination the requirement is 25 characters in a row.
(Not counting the practice run or the series of "V"s)
Numbers and punctuation marks count as two characters

After July 2001, all of the CW examinations were "fill in the blank". Of the
examinations that I have administered since that date there have been many
more applicants passing by 25 characters in a row rather than correctly getting
7 of 10 of the fill in the blank.

Good luck! I would even like to know if this information helped You.........
send Me a message......... wj5o@amsat.org

Mind the gap! - Why Spaces are important in Morse Code


Sooner or later, every Morse operator will have the pleasure of meeting a fellow telegrapher who sends very economic code: Without spaces.

This is not only annoying, it can lead to severe misunderstandings. Don't believe me? Let's have a close look at it!

A small Perl script was written to find out "dupes" among the most common words of the English and German language, when sent without spaces. There are more of them that you'd think!

Here's the Perl script: mindthegap (3 kb)

Some of the shocking results:

German

dienst = bereit, ferne = elend, frust = erlebt, funk = element, kenia = cdu, match = goethe, minister = greifen, patient = panik, planen = anlegen, proteste = probem, rtl = ard, total = mord, venedig = einnahme, virus = stille, zahlen = geliebte

English

entire = all, midwest = greatest, pension = prison, threat = defeat, thursday = birthday, widow = pretty, women = joke

Full lists: German - English


Thursday, December 20, 2012

K8NDS Helically Loaded Magnetic Loop Antenna


Enjoying Amateur Radio for 48 years now.

.

Check Out My Commcat LIve Page, watch my S-Meter.http://k8nds.myqsx.net/


Here are a few quotes from Albert Einstein that applies to all the Naysayers concerning my Helical Antenna design, especially the ones on Eham Articles:

"Any intelligent fool can make things bigger and more complex. It takes a touch of genius --- and a lot of courage to move in the opposite direction." - Albert Einstein

"As far as the laws of mathematics refer to reality, they are not certain; and as far as they are certain, they do not refer to reality." - Albert Einstein


If you need further information concerning this Loop design I will answer emails as time permits.

If You voted for Obama, please get your help and Free Bees from him, I don't contribute my time to free loaders.

All conservatives emails answered here with pleasure.

Quote:

A government which robs Peter to pay Paul can always depend on the support of Paul.

-- George Bernard Shaw


Check out my DX Contacts using my 2-element Helical Loaded magnetic Loop Antenna. NEW 05/05/2012

DX**http://www.youtube.com/watch?v=bNOuzdH2btk&feature=youtu.be**DX

Here is a Quote from VK2DX on my 2 element Helical Magnetic Loop:

Again, I am not an antenna expert - just someone who spends lots of timetuning the knob. In just 4 months this year I've made 21,000 DX contacts and trust me, I can tell the difference between good signal and great one.Your signal that evening was what I would described "Best punch for antenna footprint" I've ever heard on 20m.
All the best, 73 Nick VK2DX
Sydney, Australia


Check Out K5RPM Page, read Ron's evaluation of my Helical Loop design: http://www.qrz.com/db/K5RPM

Check Out AG6LJ Page, View John's HL mag Loop installation: www.qrz.com/db/AG6LJ

Check Out N6NBV Page, View Steve's 20 to 10 meter Mag Loop installation: www.qrz.com/db/N6NBV


Watch myYOU TUBE VIDEO's demonstrating this antenna in action:

Main: http://www.youtube.com/watch?v=2YpyLAULKqg

2nd video Part 1 http://www.youtube.com/watch?v=xTg6pVesbhc

2nd Video Part2 http://www.youtube.com/watch?v=oTPZ3E_6M8A


2 Element Helical Magnetic Loop Video

http://www.youtube.com/watch?v=fEQYQS6eC50&context=C3b97b00ADOEgsToPDskJaGpOok5Ji7jbU7wjs8zm4


Check out my page for more info: http://www.hlmagneticloopantennas.com/

**Newest 2 Element Mag Loop** Click Herehttp://www.hlmagneticloopantennas.com/2elementloop//

"Newest" (02/21/2012) 80 to 20 meter 2 element loop


17 to 10 meter version on left, Two 33 inch elements, rotates azimuth & elevation. 7.5 ft high

Elevation rotation changes polorization

On right, 80 to 20 meter version, two 4.5 ft loops, rotates azimuth only; 10 ft high


Latest Tuner design, direct drive with limit travel and motor stall Warning Led on control unit.


Remote tuner and controller Schematic/block diagram.


Latest single element design, 60 to 15 meter range. Shown with no weather cover & no paint.


Latest 60 to 15 meter design shown with weather cover & no paint.


Before Painting and after Painting with rotor added


80, 60, 40 & 30 Meter Linear Loaded Magnetic Loop, 77 inches in

diameter mounted 5 ft off the ground. Handels full legal limit 1500 Wts.

Tunes 1/1 vswr at 50 ohms from 3.0mhz to approx 12 mhz.

The Q of this loop is > 1400 at the low end of tuning (75/80 mtr range). The Q is a bit lower

in the 40 mter band, around 1000 or so. This refects the bandwidth to be approx 7 khz on 80 mtrs

and around 18 khz on 40 mtrs. The sharp tuning is actually a advantage to act like a sharp filter

out in your yard where it counts. The broadside "Near E field rejection" is approx >50 db to any local

electrical interference. A rotator can be of some advantage and seems to exibit 6 to 12 db difference

when the station is in the plane of the loop and is utilizing low angle radiation. There are times when I see as much as

24 db change. I do notice this advantage with my 40/15 version when working DX.


2 Element 17 thru 10 Meter 4 band loop

YouTube Video

Click Here

http://www.youtube.com/watch?v=fEQYQS6eC50&context=C3b97b00ADOEgsToPDskJaGpOok5Ji7jbU7wjs8zm4


Azimuth and Elevation rotation

Tests compared to the single element 20-10 meter loop & 17 meter elevated

fed ground plane with 45 deg sloping radials. The single 20-10 meter loop is

shown farther down this page, A/B testshave been consistent 12 to 15db gain

over the single loop & the ground plane.


Check my link above to see more info on this antenna.

WWW.hlmagneticloopantennas.com


Gamma Match original setting greatly effectd by the Capacitance to the workshop floor. Was 50 Ohms @ 1/1 VSWR

in this posistion; changed to 2.5/1 when rasised to operating posistion. This was matched here only for testing purposes.

Do not solder match into place until errected.


Actual Gamma Match was perfected on a ladder and is now 1/1 VSWR @ 50 ohms

across the entire tuning range.


Rear view of feed wire/gamma match exiting the PVC tube


Oldest 20 -10 meter loop; This loop is only 33 Inches in diameter, it is mounted 4 feet off the ground on arotor. The rotation seems to make a large difference. I have recieved reports of as much as 24db signal changeby rotating it just 90 degrees.

I am contributing this to polorization change, a very usefull function.

I also notice as much as 18 to 24 db change with local contacts. This design is named by me as a"Helically wound linear loaded magnetic loop"You won't find this anywhere on the internet, it is my design. I am disclosing this to the public through a "Disclosure rather then a patent".

No one else will be able to patent this, I am giving it for free to all those interested in building one. A great solution for HOA Hams.

Now there is no excuse for not getting on the air because the XYL wants to live in an antenna resticted environment.


PVC Loop Frame using flexable PVC, NEW 12/17/2012


Gamma Match detail.OLD DESIGN, do not use steel clamps; interfers

with gamma tuning. Use ONLY Plastic Clamps. Solder gamma then clamp

with heavy duty plastic cable clamp to secure.


Mounting of the SO-239 Connector


The following Photos are the actual Bandwidth characteristics that were measured in the real antenna position by sweepingthe antenna. This will give the builder a feel for what to expect out of each band when designing a loop.


80 Meter bandwidth trace, depicts very narrow band width, a characteristic of the lowest design frequency.

Bandwidth is ONLY 11 Khz @ 2:1; this makes a great stop band filter for QRM off to the side!


60 Meter trace20.2 khz 2:1 bandwidth, Ignor the spike at 5.400 mhz at the left of the desired trace.

It was an actual on theair RTTY signal, very strong.


40 Meter trace,30.6 Khz 2:1 bandwidth


30 Meter trace76khz 2:1 bandwidth


This is a trace of the 80/30 meter loop tuned on 20 meters. The loop is no longeroperating in the mode of a magnetic loop.The inductance of the driven element is too long. The electrical circumference is approaching 1/2 wave length.It no longer has a null pattern on this band. With that being said it works real wellon 20 meters but has the characteristics of a vertical antenna, I can not null out noise on this band with this antenna.I have received very good signal reports even so. As you can see thebandwidth is 224 khz 2:1, no longer a HI-Q antenna.


The following are photos of the 20 - 10 Meter loop.


20 Meter bandwidth is 62.6 Khz 2:1


17 meter bandwidth is 100.5 Khz @ 2:1. this just about covers the entire phone

band less then 2:1 VSWR


15 meter bandwidth is 142.6 Khz @ 2:1


12 meter bandwidth is 222.6 Khz @ 2:1


10 meter bandwidth is: 190 Khz @ 2:1


These "Helically Wound Linear Loaded Loops" are performing far beyond my expectations.

I hope to see all of you on the air to show you proofHave Fun! K8NDS


My 8 area call sign comes form Michigan. I have retired in the southwest in the city of Cottonwood in the Verde Valley high desert 3580 ft elevation, 100 miles north of Phoenix 45 miles south of flagstaff. I retired from General Motors corporation in Warren, Michigan after 29 years in the engineering group. My last assignment was development of the GM Onstar system where I was responsible for automotive antenna developement, such as GPS, Cellular and AM/FM.

My radio days go back to when I was 16 years old, I met a local Ham in the neighborhood by listening to 160mtrs on the sub harmonic using an old tube type AM radio. The gentalman (W8LVR) gave me the novice test and I passed it. I worked and got my General Class ticket 6 months later. Two years later I joined the USN and became a Radioman aboard two different DD class destoyers. I became very proficient at CW and copied about 30 WPM on a typewriter. In the last 18 months of the military I studied for my First Class commercial ticket, took the test and passed 3rd, 2nd and 1st in the same day. When my tour of duty was finished I went to work for a communications company doing two way radio repair and repeater installations. I also worked as a week-end Broadcast Engineer of a large station in the Detoirt area, it gave me plenty of study time as I went to school while doing both jobs.

Along came an opertunity to interview at General Motors Detroit Diesel Division, I got the job and worked in the Advanced Engineering Laboratory measuring paramenters of diesel engine design. Two years later I transfered to the GM technical center in Warren Michigan. I worked in Electromagnetic Interference department (EMC). I developed many test methods for EMC employing and developing fiber optic transmitters and receivers. I then transfered to Advanced Engineering and ended up working on AM/FM antennas and disecting competators systems. Along came the start of Onstar, I worked on testing the first Onstar hardware systems for about ten years. I developed many test fixures and test methods for GPS and celular antennas. My last task was putting together an RF lab and Audio Lab for Infotainment, I retired from that position. I have some Antenna patents under my name /GM as the owner of course.

My favorite hobby is dreaming up new Amateur Radio antennas designs, I am building several Magnetic Loop designs for limited space usage.

I also do custom computer consulting and design.

One of my other interests that I have studied and examined for many years is the effects of EM fields on the human body. I have designed a sleep system that shileds the natural brain waves from the RF spectrum, keeping the nervous system tuned to normal. My XYL and I have been using this for 2 years now, it is amazing! I also have other friends that use it, they will also swear to it. It makes you sleep like a baby! ( that is a good sleeping baby.Hi Hi)

Many think that EM wave effects on the human body is all hocus pokus, but I can tell you from experience that EM wave exposure causes many isues including a poor sleep function which is the downfall of good health.

I have studied health & nutrician for over 37 years now, my XYL and I are very healthy as a result (no medications and no doctors) . Without your health you have nothing, I guess that is why it is my 2nd varorite hobby.

EMF Exposure and YOU! http://www.youtube.com/watch?v=8XWTOI9EMY&context=C3043543ADOEgsToPDskJaGpOok5Ji7jbU7wjs8zm4

Magnetic loop antenna helical loop antenna 2 element

Magnetic Loop antenna Helical Loaded part II(2/2)

Magnetic Loop antenna Helical Loaded part II (1/2)

Magnetic loop Helically Loaded Magnetic Loop Antenna

Helically Loaded Magnetic Loop Antenna


Helically Loaded Magnetic Loop Antenna


Object of the design:

There are many designs and information available on the net concerning “Magnetic Loop Antennas”.

Even though these antennas are a fraction of the size of a full size resonant antenna, size of the lower frequency loop can still be quite large for a limited sized property. The object of my design is to compact the size of a magnetic loop while trying to maintain the efficiency of the loop.

Theory of Design:

Anyone that has delved into the theory of magnetic loops knows that smaller size loops result in very poor efficiency at lower frequencies. A magnetic loop for the 80 meter band should be 15 ft diameter to produce efficiency of 88%. Using a 3” diameter copper pipe at a 15 ft diameter will only produce a 7Khz band width. This band width requires very precise tuning.

By implementing a helically wound design a 6ft diameter 80 meter text book loop seems to emulate a 10 to 15 ft diameter loop of a single conductor. The 80 meter bandwidth of my 6 ft loop is 11Khz. The loop construction technique provides for light weight and cost as compared to a 15 ft loop constructed from copper tubing. This design has been accomplished by using just enough copper to take advantage of “Skin Effect”. This allows the use of a thin flat copper conductor which provides more surface area then a heavy copper pipe while still providing a large surface area of RF skin depth. At the same time the radiation resistance is raised considerably while only raising the IR losses slightly. The ratio of Radiation Resistance to IR losses equals the efficiency. The use of PVC tubing and flat soft copper strap provides a sturdy substrate in which to wrap the soft copper strap while increasing inductance for the same circumference as a substantially larger loop. The result is a two part gain; the same length of copper conductor that is required for a 10 ft diameter loop equates to similar performance wound on a 6 ft diameter substrate; thus reducing the size, weight and cost while still retaining the performance. These miniature loops for bands as low as 80 meters have now become such a small footprint that they can be employed in an HOA situation even if hidden between foliage. There are still a few factors that I have not calculated yet. The use of loading and the distributed capacitance somewhat adds a mysterious factor to this design. I am still working out all the details. The apparent efficiency and the large increase in Band Width tell the story. My actual “on the air testing” has depicted better results than I could have imagined. So far my “seat of the pants measurements” has shown a great increase in the tightness of the doughnut pattern shape. The approximate 4 degree very sharp null I am seeing to near E field noise seems much tighter then my previous single conductor loops. I have also noticed from many signal reports that I am experiencing as much as 3 to 4 S-units increase/decrease in signal strength by rotating the antenna with distant stations. This seems to be more apparent depending on the angle of radiation being utilized at the time of contact. There may possibly be more horizontal radiation off the side then a normal single conductor loop; this is just theory for explanation at this point. The reason that I am theorizing the polarization is due to the fact that I have seen stations get much stronger broadside while I other stations get much stronger in the plane of the loop. Text book magnetic loop theory states stronger in the plane of the loop. This is definitely the case for ground wave stations; I have tested this in depth with great repeatability. I can get a 3 to 4 S unit change at 20 miles on the 20 meter band, the signal will just about completely null broadside to the loop.


Details of building this design:

The Hi-Res photos that I am attaching to this article will depict more than can be described, thus I will not go into great detail.

Starting with the PVC octagon frame, calculate your PVC parts by the size of the loop desired for the particular frequency range. View my photos carefully to observe how to mount the SO-239 connector; do this before gluing any frame parts.


Use a hard temper piece of copper flashing for the underlay of the SO-239 connector. Soldering this connector as the photo shows is important. The photo also depicts how the center feed from the SO-239 was routed thru the PVC- T. Finish this part carefully before any gluing. Use a short length of ¼ inch copper tubing to follow thru the PVC T for stability of the connection. If this connection breaks after gluing the frame you will be in trouble! Fill the short length of tubing with solder then heat it a push it over the center conductor of the SO-239 and heat generously. The other exiting end out of the PVC T will then be supported by the T itself, this makes for a very strong connection point.


Use cleaner and good glue and glue the frame together, use ingenuity when assembling the frame as to what parts to glue first. Once the part is glued and it isn’t right it will be very difficult to correct.

Make sure to use both good quality PVC cleaner and Cement for good bond which will provide stability of the frame. The frame will need about 3 coats of high quality Krylon spray paint. I use flat black as it hides well, Krylon makes a spray paint for plastics; this is the one that I recommend. If you do not paint the frame the PVC will deteriorate fast especially in the western state where I am located. The next generation of prototype will use a plastic protective paint on the substrate and a clear lacquer coating over the copper for corrosive protection.

Now it’s time to wrap the frame, this part is a bit tricky the first time you do it. The rule that used to build both prototype loops was adding 37.5 % of conductor length to the amount of conductor required for a single turn loop. Credit is given here to “AA5TB” the work on a great loop calculator. AA5TB calculator has been very useful to speed up calculations, I have compared it to hand calculations, it is very exact; just search the net for his Excel program. Plug in all the factors for the loop that you want to build and follow my rule for length of conductor. Use the width of the copper strap X2 in place of the circumference (diameter X 3.14) the formula requires diameter. Divide the calculated length of the conductor in half, and mark the center of the length. Start the wrapping at the marked center at the SO-239, pay close attention to the pitch of the material. Again some ingenuity on calculating the wrap spacing is necessary here. Make sure that the two ends of the material come out even at the capacitor/tuner feed point. If care is not taken here you will have an unbalanced loop. Once the loop is wrapped and if it came out even, then temporarily tape the ends in place while you solder the center of the flashing very carefully to the so-239 supporting foil.


Capacitor & Drive Motor Assy:

The tuning capacitor is one of the most critical devices in this build project. Choosing to use anything but a good quality vacuum variable capacitor will result in substandard performance compared to the results claimed in this prototype antenna. First issue is power handling, my loops handle SSB full legal limit (1500wts), and are rarely run at more than 1Kw. To keep the Q high and power capability high use a vacuum cap otherwise the results will probably be disappointing. Humidity will also play a role in affecting your antenna by using an air capacitor. I am using a 12 volt gear reduction motor with a forward and reverse controller arrangement. The down side is the long times required to change bands. The reductions need to be slow for precise tuning, thus a single speed geared motor is not the best solution. My next prototypes will utilize a stepper motor control system which is currently in development. Utilizing a stepper motor control in conjunction with a PIC or other small processor board the speed can be controlled enabling quick band changes, and then use a system of fine tuning buttons to move about the band of operation.


Tuning unit mounted in the operating position.

Great care must be taken with all connections; every milli-ohm gets multiplied in the main conductor will be subtracted from the total radiated power. This results in lower antenna efficiency. All overlapping joints in were tinned on the underside, and then quickly heated with a torch. After cooling they were all soldered using a very hot iron all around the copper edges. Try not to leave any sharp edges, there can be 15 KV at the area around the capacitor connection; some corona arching could happen at sharp points.


The Gamma Match:

Several different matching techniques have been tried, most worked although negligible difference was noticed using the simple gamma match. The gamma match also seems to be the flattest match across the entire tuning range. Once tuned to the center of the tuning range of the loop design the match appears to hold a flat match of < 1.2 to 1 @ 50 ohms across the range. It will be the farthest off at the lowest band. It takes a bit of experimentation to get it perfect. Both loops are 1:1 @ 50 ohms except on the lowest designed band; there it may be 1.2 or 1.3 which is negligible.

If you tune your loop in the horizontal position, do not solder it in place until you mount it in the operating position complete vertical plane. Just use a SS hose clamp fastener to get the match, when you are satisfied then solder it to the foil and clamp over it to keep it secure. The 80/40 meter match proved to be twice as long until I mounted it in the vertical operating position.


Match was 1:1 @ 50 ohms here, DO NOT SOLDER YET!


Rear view of gamma match in operating position, indicating how the SO-239 connection exits from the rear of the PVC T


Front view of gamma match soldered in place; 1:1 @ 50 ohms


More photos of construction in progress


Gamma Match – 20 thru 10 meter loop

20 thru 10 meter loop under construction, this one will be painted after finished


Loop Controller, controls both loops with side switch


Finished 20 thru 10 meter loop ….. Just needs paint

Parts list


Copper foil/flashing: 3 inches wide X .008 thick (8 mils), Soft anneal.

Less than 8 mils will cause heat loss resulting in poor efficiency. Efficiency is the ratio of Radiation Resistance to IR losses. Material that has a large RF Skin area is required while still thick enough to handle VERY LARGE circulating currents. Unfortunately this is hard to find and very expensive in small quantities. I have found that suppliers do not want to deal in the lengths required. I have had to purchase large quantities of this material to get cost effective. Please email me if you need options for the copper flashing.

K8NDS@HLMAGNETICLOOPANTENNAS.COM


PVC: 2 inch schedule 40 PVC has approx 2.25 inch OD. This size is required for the 80/30 meter version. The diameter is required to achieve the necessary inductance of the overall loop diameter.


Vacuum Capacitor: At least a range of 10 pf to 250.

If you use the loop formula it will indicate that you need more “C” but the helical winding brings that capacitor value down. To be safe I would purchase 10/300pf version. A 10 to 500 pf version could be utilized in case you might want a larger cap for future development. More precise control will be realized with the 10/300pf using my helical wound design. The ratio of capacitance to the gear ratio of capacitance to turns will smooth out fine tuning. The voltage rating should be 15 KV @ at least 40 to 50 amps. Many of the Vacuum Capacitors especially surplus units are drastically under rated. Some are capable of double the posted rating. Check this out with the supplier. 15 kV is possible across this capacitor running 1KW. If a 25 KV version can be located, it would be the best choice. The SSB or CW modes and respective duty cycles actually allow the use of smaller KV values. If you plan on running key down, AM or high power digital modes you may want to reduce your power output to 500 watts continuous.

Tuner Mounting Board: An inexpensive easy to purchase material is a cutting board from Walmart. About 7 to 8 dollars can buy a durable cutting board that is a very good insulator (White/opaque) in color. It can easily be cut down to size to mount the motor/drive system and capacitor.

Capacitor Clamps: Use some ingenuity here depending on the type of Vacuum cap that you acquire. As can be seen in my photos electrical conduit clamps are used on one unit. Care must be taken that the clamps are very tight and making a very positive connection; the use of copper flashing in between the clamps and the cap just to make sure.

Drive System: In viewing my photos it can be seen that a geared 12 volt DC motor, reversible. If this your choice a means of keeping track of position in the range of the capacitor is necessary, if care is not implemented here you will either jam the cap to one end or unscrew the shaft at the other end depending on the cap construction. Utilizing ingenuity/design limit switches can be employed in the control circuit. There are Magnetic loop sites on the net which have accomplished this method. I just keep track of the band of operation, I have never dead ended the system yet but that is me; this is not the recommended way to travel. This was my prototype version; I am currently working on stepper motor controls for fast and precise tuning. Keep in touch with my web site and I will post updates.

SO 239: Pay attention to my instruction and photos on how to mount the SO-239, once the PVC is glued together it will be difficult to repair.


Radiating the Cows! Hi Hi……….


The author/ Designer Rich K8NDS

Thank You for reading the article.

I hope that you have as much fun with these stealth antennas as I have had. It is a way for the HOA restricted Amateur operator to come very close to the performance of full size antennas.

Please look me up if you want to see these antennas in action, I think you will be quite surprised at the functionality of these small antennas. Many on the bands have heard these already and have stated how good the signals were………… in amazement!

You can find me whenever I am active on the bands by visiting QRZ.com and look up K8NDS

Then just click on “MY QSX” link

It will take you to my page where you can see what frequency that I am talking/listening on. Many have already done this. You can also view your own signal strength there while you are transmitting.